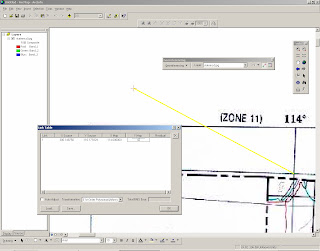
Georeferencing involves assigning real-world coordinates to a number of reference points on the image. In ArcMap, this is done using the tools available in ArcMap’s Georeferencing Toolbar. In this example a map is used which has real-world coordinates
labelled near the four corners of the map. These points can be identified and assigned their real-world coordinates. These points are referred to as ‘control points.’
1. Add the image file to ArcMap (by using the 'add data' button just as you normally would - you will be asked if you wish to 'build pyramids,' which you can do to shorten the display time. Building pyramids will result inproduction of *.aux and *.rrd files).
2. Select View/Toolbar/Georeferencing
3. After selecting control points, zoom into one of them so you can place your mouse as accurately as possible on the point.
4. Under Georeferencing, uncheck “Auto-adjust.”
5. Click on the “Add control points” button.
6. Click on the identified point on the map image and move the mouse somewhere a bit further away. Then click the mouse again. You’ll see a line between a green point and a red point.
7. The green point is at what’s referred to as the ‘source.’ The red point is at what’s referred to as the ‘target.’ If you wanted to warp the image such that it overlaid with a data layer you had added to ArcMap, the red point would need to be placed at the corresponding point of the existing data layer. However, in this example, you are not warping the image to overlay with a data layer in ArcMap. Rather, you’ll need to provide ArcMap the target coordinate values. To do this, click on the ‘view link table’ button on the Georeferencing toolbar. Change the map x and map y values to reflect the real-world
values read from the map.
8. Repeat steps 6 and 7 for all of your control points. If you make a mistake, you can a control point by selecting the appropriate row in the table and pressing the “Delete” key on your keyboard. In this example, the final table looks like this:
9. When you have finished entering control point data, click on OK to close the link table.
10. Select Georeferencing/Rectify. In the next window, change any of the defaults if desired. When the rectification process is finished, you will see that .tif and *.tfw files have been created.
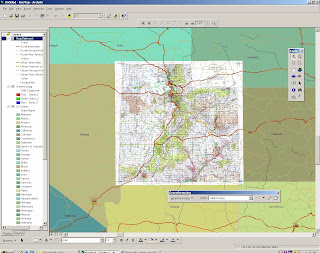
11. Select Georeferencing/Update Display to view your results. Now you should be able to overlay other data (provided those data use the same coordinate system). This example below shows that data for states and major roads overlay with the image.


